
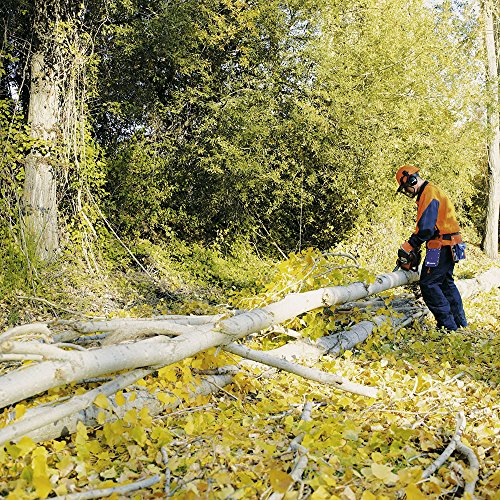
If you notice that your chainsaw is starting to take longer to cut and needs to add more pressure as you go, your chain might be dull.
Luckily, you can always restore the sharpness of the chainsaw chain to bring it back to its optimal conditions.
In the following guide, I’ll walk you through a step-by-step: sharpening a chainsaw chain a guide that shows you all the steps needed to get the project done.
So without further ado, let’s dive in!

Should You Sharpen the Chain While Attached or Removed from the Bar?
Most chainsaw models on the market are designed in a way that allows you to sharpen them without removing the chains from the bars.
I recommend that you sharpen the chain while it’s on the bar to avoid making the process more tedious and keep the chains attached the right way.
Additionally, the guide bar doubles as a support surface that keeps the chain held firmly while sharpening.
Changing the Direction of the Chainsaw Chain
If you change the direction of the chainsaw chain, it’ll be installed normally, as the chain goes both ways.
However, if you put the chain on backward, it’ll not cut properly because the cutting tip will be facing the wrong direction.
As a rule of thumb, the cutting tip of the blade should always be facing away from you in which it travels from the back of the chainsaw all the way to the front, not the other way around.
A Step-by-Step Guide to Resharpen a Chainsaw Chain
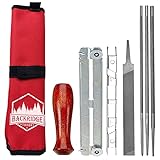
Step 1: Prepare Your Tools
Before heading into the project, there are some essential tools that you need to pick. Here’s a quick list of the items you should prepare:
Step 2: Make Sure the Chain Needs to Be Sharpened
To avoid wearing the chainsaw chain away, you need to sharpen it only when it’s needed. A lot of people notice that the chainsaw chain became extremely dull after they’ve removed it for whatever reasons.
In most cases, the chainsaw isn’t actually dull. Instead, the user might have changed the chainsaw direction and it’s now installed on backward.
Make sure that you’ve installed the chain the right way by checking the user guide manual before attempting to sharpen the blades.

If you haven’t removed the chain recently, a quick way to test the cutting quality of the chainsaw is by checking the waste material produced as the saw cuts.
If you find powdery dust, it means that it needs resharpening. If you find wood chips, it means that the chainsaw is working properly and needs no sharpening.
Step 3: Secure the Chainsaw Chain
The first thing you need to do is engage the chain brakes to prevent the chains from moving around as you use the sharpener kit to work on the chainsaw.
After engaging the brakes, make sure that you gently clamp your chainsaw in place wherever you’re going to continue the project.
For that, you’ll need a tabletop clamp or a vise. Remember to keep the chainsaw at a suitable angle to avoid back fatigue by bending over a lot

Step 4: Tighten the Chain with Tension Adjustment System
After you secure the chainsaw, you need to ensure that the chain is tightened to maintain even height throughout the guide bar.
This will ensure that all the teeth of the chain are sharpened evenly, so you have a consistent performance.
Step 5: Mark the First Tooth to be Sharpened
To avoid going through the same tooth twice, you’ll only need to mark the first tooth of the link with a bright permanent marker.
Don’t worry, these marks will disappear as you sharpen the chain or use it. It’s recommended that you color it somewhere where the file won’t reach, so you don’t chip the mark away.
Step 6: Start Filing the Chain Teeth
With everything ready, the chain is ready for filing. Pick a round file that has the same diameter of the teeth from the sharpening kit. Such information is easy to get from the user’s manual.
After that, check the manual to find a suitable angle at which the teeth of your chainsaw should be filed, as it changes from one model to the other.
Set the file guide between the teeth on the chain, with the arrows on the file guide pointing towards the end (the nose) of the chainsaw bar.
While keeping a steady 90-degree angle, slide the file guide forward 2 to 6 times across the tooth of the blade.
You’ll know that the tooth of the chain is sharpened when you see the shiny silver surface. Remember to tap the file every now and then to drop the caught shavings for efficient filing.
The rollers on the guide will help you maintain the angle, but you should be careful. After 3 strokes in the same direction, carry on to the next tooth, and so on.
Remember to release the breaks on the chainsaw whenever you want to move the chain to file other rivets.

Step 7: Inspect and File the Rakers as Needed
The rakers are the other pointy parts on the chain that faces you while holding the chainsaw. These parts need to be on the same height as the teeth (the cutters).
To make sure that they’re of equal heights, use the pick the depth gauge from the sharpening kit and pace it over the chain.
If you find that the rakers are higher than the depth gauge either by seeing or feeling it by hand, file it down to be of the same height as the depth gauge.
You might come across some rakers that are as high as the depth gauge. In that case, skip them and inspect the next one, make sure that you go through all the rakers before you’re done.
Wrap Up
With that said, you now know how to bring your dull chainsaw chain into working conditions with this step-by-step sharpening a chainsaw chain guide.
While the steps are easy to follow, if you’re unsure about the steadiness of your hand while sharpening, you can always seek external help to avoid damaging the chainsaw chain. A professional can easily sharpen the blade for quite an affordable price.
